Figures and graphs can be inserted into your report or proposal as image files (JPG/GIF/PNG).
You can create your figure or graph with many applications (e.g. Word/Excel/PowerPoint). Copy the image and paste it into an image editing program (e.g. MS Paint or Paintbrush for Mac) and save it as an image file (JPG/GIF/PNG). Now you can upload that file to your media library.
Why can't I copy and paste from Word?
Word processor files with images are much larger than web pages and the image is stored in the file with the text or a reference to where the image is on your computer. Web pages do not store the images in the same file as the text. They are stored and delivered separately and the browser assembles the page and displays it to the viewer. Therefore, you must upload each image separately.
Inserting figures and graphs into your report or proposal
Figures, graphs and photographs are all images. To add an image to your report or proposal, click on the "Add Media" button.
![]()
Note: Not all report or proposal text fields support images. If there is an "Add Media" button at the top left of the text field, then you can add images to that text field.
When you click on the "Add Media" button, you are shown a page with two tabs across the top "Upload Files" and "Media Library". Images you have uploaded previously are in your "Media Library". If you haven't uploaded the file, you will need to use the "Upload Files" tab.
To upload an image
- Click on the "Upload Files" tab
- Click the "Select Files" button
- Select the file from your computer
- Click "Insert into Post".
After the file has uploaded, there are a few fields you will want to complete:
- Title - is used when searching for images in the media library. The filename is used, but it is good to change it to be a more descriptive title. It is also used on the image's attachment page.
- Alt Text - will be used by browsers for the blind and for search engines. Enter a description of the image so the visually impaired will know what the image is conveying.
- Caption - will be displayed below your image. Leave blank if you do not want a caption below your image.
Attachment Display Settings:
Alignment - has 4 options:
- None - the image will appear "in-line" based on where your cursor was when you clicked the "Add Media" button. One line of text will be on the same row as the image.
- Left - the image will be positioned to the left edge of the text area and the text will wrap around it to the right.
- Right - the image will be positioned to the right edge of the text area and the text will wrap around it to the left.
- Center - the image will appear in centered in the text area and no text will appear on either side of the image.
Link to - has 4 options:
- None - the image is not linked.
- Media file - the image is linked to the full size image. This is useful for thumbnail images or if you want the user to get large image, but the page only shows a smaller version.
- Attachment page - a page with the image and the title and description. Please do not use this option.
- Custom URL - the image is linked to another web page. Please do not use this option.
Size - depending on the size of the image, there may be several choices (thumbnail, medium, large, and full size). If you upload an image from your camera or a very large image (> 1000 pixels wide), do not use the full size images. Instead, insert a smaller version and link it to the Media file. Ideally, resize the image before you upload it to be the size you want to display and use "Full Size".
If you insert a chart or graph, you probably want to select "Full Size" so the readers can read the text. If the image needs to be viewed full screen, change the "Link To" option to be "Media File".
After you make your selections, click the "Insert into post" button.
Once the image is in your report/proposal, you can drag it around. You can resize it, but it is best to choose the appropriate size when uploading and inserting it.
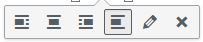
You can change any of the choices you made by clicking on the image and selecting one of the buttons shown.
Inserting Audio or Video
When linking to or uploading a video or audio file, you agree to provide captions in order to meet accessibility compliance requirements.
You have the following options to provide captions:
- Upload the video to your own YouTube channel and turn on auto-captioning. Add the YouTube link into the project report.
- Send videos to your regional communication specialists to upload to the regional YouTube channel which provides auto-captioning and ask the regional communication specialist to add the YouTube video into the project report.
- Include transcripts along with videos or audio when uploading them to the media library. Insert the videos or audio files and upload the transcript (TXT or PDF) using the Add Media button into the project report.
When inserting video, MP4 and WEBM videos will be embedded. MOV files will be inserted as a link to download the file. If you need help converting your video to MP4 or WEBM, contact help@sare.org.
Deleting Media Files
To delete a media file:
- Go to the Media Library (https://projects.sare.org/wp-admin/upload.php).
- Select the file to be deleted.
- Click the "Delete Permanently" link in the lower right corner.
Please use this cautiously. If any other pages are using the file, they will be broken.
Rotating Images
Occasionally, the software you use to view an image on your computer rotates it automatically (based on information stored from your camera) when you view it, so an image that is stored sideways appears correct on your computer. When you upload it, it appears sideways. To correct this, edit the image using the following steps:
- Go to the Media Library (https://projects.sare.org/wp-admin/upload.php)
- Click on the image to view it
- Click on the "Edit Image" button under the image
- Use the image editing buttons to rotate or flip the image:

- Click on the "Save" button to save your rotation - for large images, this may take a minute or two.
- Click on the "Update" button to save your changes.